Headcount Camera Project
10 Aug 2019 - Mateo Atwi
This summer at Stuller, we wanted to see the flow of traffic through our hallways in order to understand the times where there might be higher traffic. I was tasked with coming up with a way to count the heads coming through the hallway. I decided to do so using a Raspberry Pi 3 B+ and a web cam. My $100 solution gave us a reasonable estimate for the traffic through our hallways during the day.
Skills Learned and Used
- OpenCV
- Logging
- Frame analysis
- Computer vision
Background
Data driven decisions are a must in engineering, so the question remains: how do you collect good data? The question goes even further: how do you collect good data for relatively low cost? In terms of computers, the cheapest you can pretty much go is a Raspberry Pi. This is an incredible test showing that we can do object tracking and collect data using a very low cost platform.
Program Description
This code uses OpenCV to track and count objects as they pass under a webcam. The computer used is a Raspberry Pi 3 B+. The webcam used is a Logitech C525.
I based my initial code and the ideas off of this tutorial online (https://www.hackster.io/phfbertoleti/counting-objects-in-movement-using-raspberry-pi-opencv-015ba5).
After initializing and setting up the program, the actual process involves the following steps:
- Grayscale
- Gaussian blur
- Difference
- Thresholding
- Dilating
- Frame combination
- Contour finding
- Contour processing
- Tracking
Setup
Packages
Run the following set of commands in your terminal to install OpenCV.
sudo apt-get update
sudo apt-get install
sudo apt install python3-opencv
Imports
First we need to figure out which packages we will use like so:
from datetime import datetime #import datetime to get the date and time
import math
import cv2
import numpy as np
import logging
from Datetime import datetimeis for logging with the date and time.import mathis used to do some simple algebra to track an object.import cv2is the OpenCV library for interfacing with the camera and for processing frames. This is probably the most important module here.import numpy as npis the python matrix module used to process matrices.import loggingis the python module for logging information as we receive it.
Global Variables
Once we are finished importing new modules, we can setup our global variables. Each variable is explained in the comment beside it.
#global variables
width = 0 #width of screen
height = 0 #height of screen
EntranceCounter = 0 #number of entrances
ExitCounter = 0 #number of exits
LineWidth = 5 #width of center line
MinContourArea = 9000  #This is the minimum area of the contour that we are looking at
MovementTolerance = 140 #This is the distance and object can travel in one frame before it will be lost
BinarizationThreshold = 60  #This is a threshold for detection
ReferenceFrame = None #This is where the reference frame is stored to be used
Logging
An important aspect of this program is the logging. Logging is handled by the python logging library.
logging.basicConfig(filename="Data/" + timeNow.strftime('%Y-%m-%d_%H:%M:%S') + "_logfile.log", format='%(asctime)s %(message)s', datefmt='%Y-%m-%d %I:%M:%S %p', level=logging.INFO)

logging.info("Created " + timeNow.strftime('%Y-%m-%d_%H:%M:%S') + "-HeadCount.csv")
logging.info("Type, Number")
logging.info("Entrances, 0")
logging.info("Exits, 0")
Helper Functions
There are 4 main helper functions being used. I will not go into them here as they are explained lower. The sub-bullets under them are the steps they correspond with.
ProcessGrayFrame- Grayscale
- Gaussian blur
ProcessThreshFrame- Difference
- Thresholding
- Dilating
ContourCompare- Tracking
ContourTrack- Tracking
Initialization
The following code serves to prepare our camera and our reference frame and a few other small things so that we can continuously loop and compare frames. The reference frame is critical because we use it to compare to every frame to see changes
#start capturing footage
camera = cv2.VideoCapture(0)

#force 640x480 webcam resolution
camera.set(3,720)
camera.set(4,480)

BinaryFrame1 = np.zeros((480, 640), dtype=np.uint8)
ContourData = []
ActiveContours = []

#The webcam maybe get some time / captured frames to adapt to ambience lighting. For this reason, some frames are grabbed and discarded.
for i in range(0,20):
    (grabbed, Frame) = camera.read()
    ReferenceFrame = ProcessGrayFrame(Frame)
Steps
The following sections explain step by step how we are processing a video frame by frame.
Frame capture
First thing we need to do is capture a frame from our camera. We can go ahead and check the size of the frame break from our program if we do not find a frame.
(grabbed, Frame) = camera.read()

height = np.size(Frame,0)
width = np.size(Frame,1)

#if cannot grab a frame, this program ends here.
if not grabbed:
    break
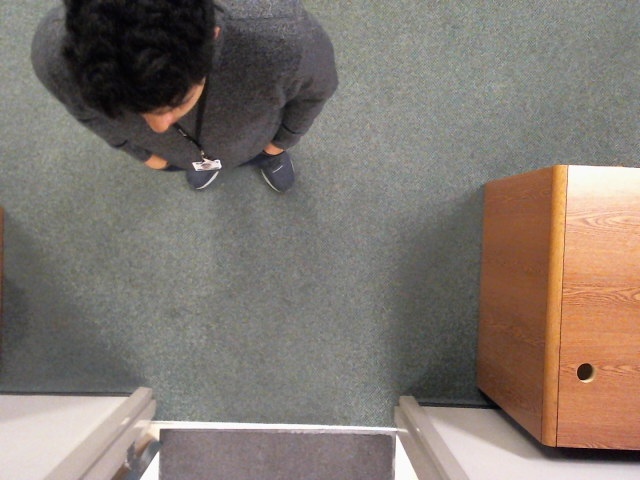
Grayscale
We remove the RGB data from the image to make it gray scale. Gray scale contains 3x less data than RGB.
GrayFrame = cv2.cvtColor(Frame, cv2.COLOR_BGR2GRAY)
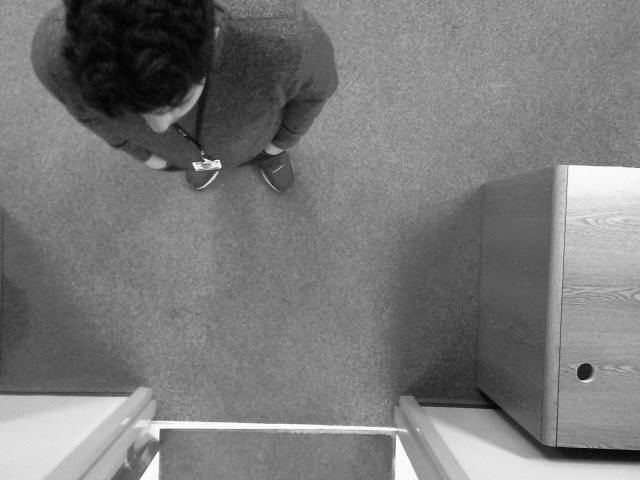
Gaussian blur
Now we apply a gaussian blur to smooth out the image. We don’t want sharp edges when we compare to our reference image that has already been blurred. This decreases the tendency of noise and shadow to be detected in our image.
GrayFrame = cv2.GaussianBlur(GrayFrame, (21, 21), 0)
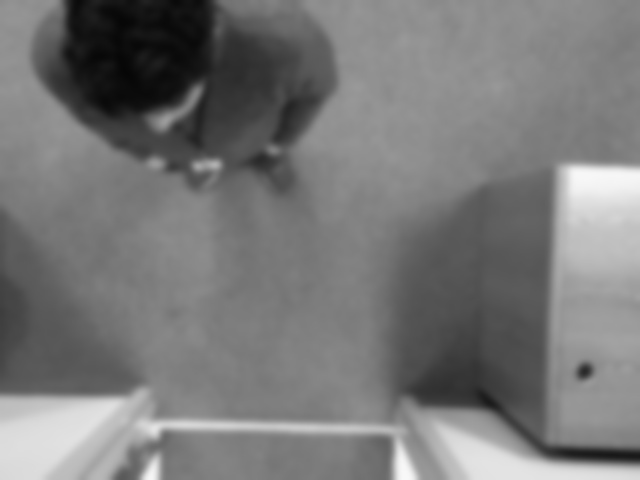
Difference
Next we take the difference between the reference frame and the gray frame that was just taken.
FrameDelta = cv2.absdiff(ReferenceFrame, GrayFrame)
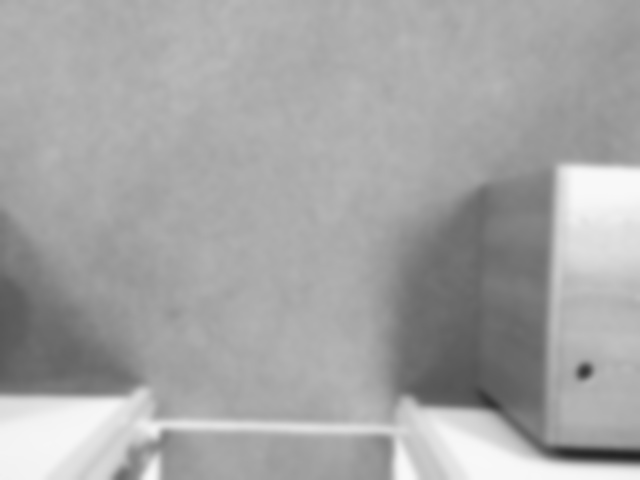
Reference frame
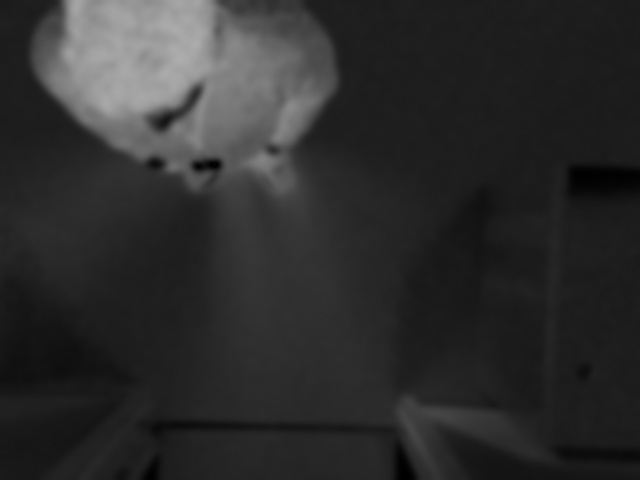
Difference frame
Thresholding
Now we take the difference frame and we create a threshold that our difference needs to make. This leaves us with a binary (0 or 1) frame where the 1 is a white pixel where change is detected.
FrameThresh = cv2.threshold(FrameDelta, BinarizationThreshold, 255, cv2.THRESH_BINARY)[1]
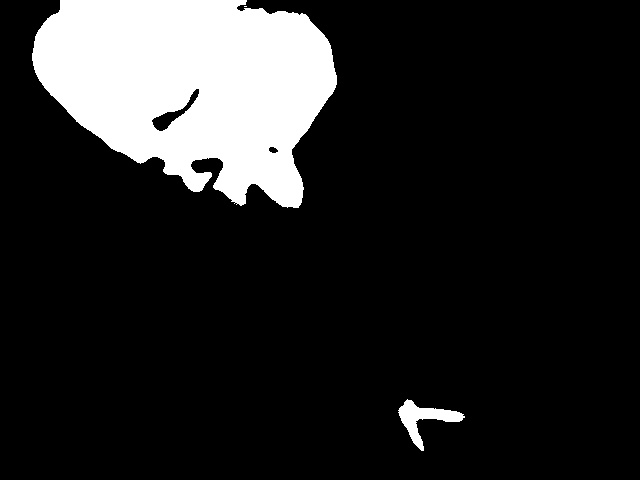
Dilating
We take the binary threshold frame and we dilate it and make the white contours slightly larger. This allows us to absorb any parting lines that may exist on a tracked object. Additionally, this allows us to absorb any holes in our contours that might exist.
FrameDilate = cv2.dilate(FrameThresh, None, iterations=2)
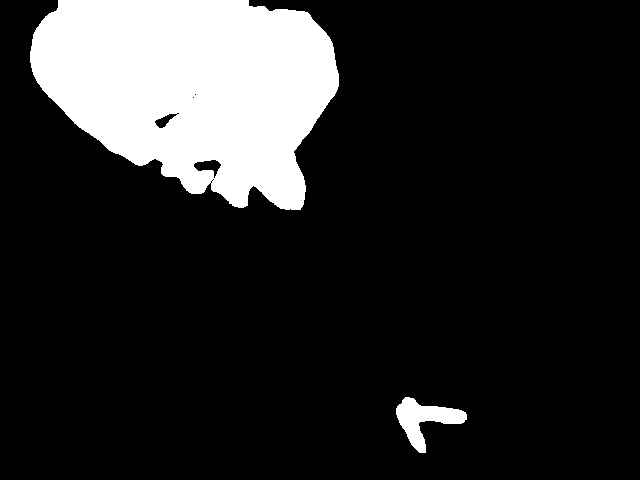
Frame combination
Since we are going to track objects and use motion to count the objects crossing the screen, I decided to add an extra step where we actual save the processing of the previous frame and combine it with the latest frame. Bellow are binary frame 1 and binary frame 2 where binary frame 2 is the latest frame.
BinaryFrameCombo = cv2.bitwise_or(BinaryFrame1, BinaryFrame2)
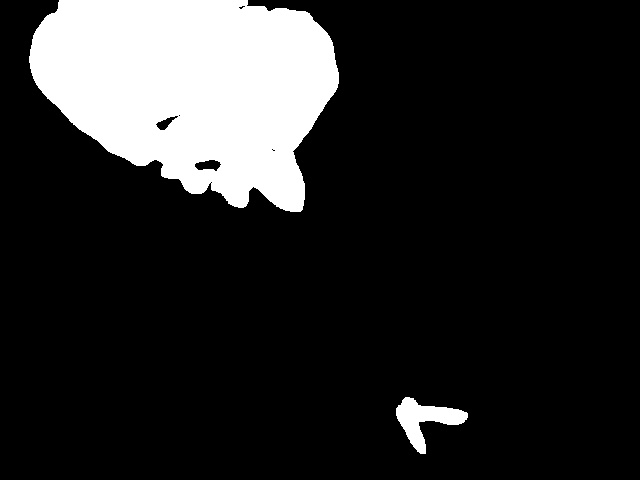
Binary Frame 1
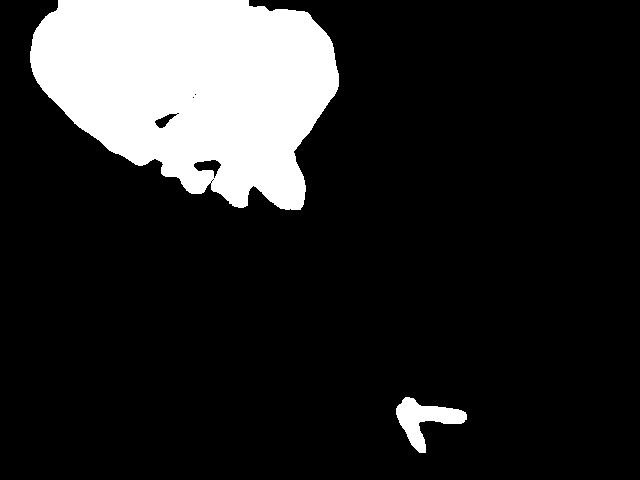
Binary Frame 2
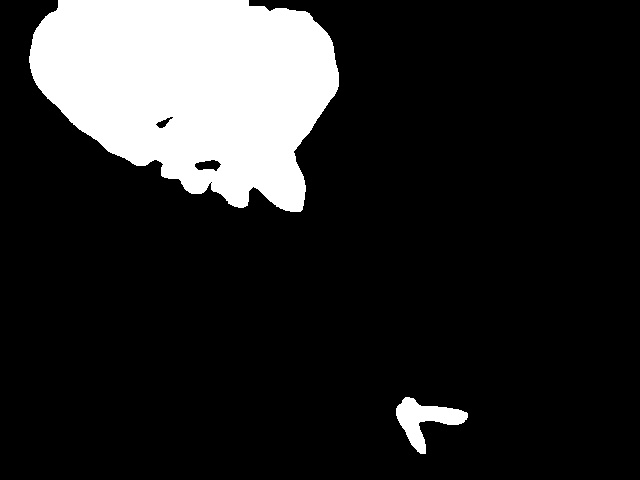
Binary Frame Combo
Contour finding
The next thing we want to do is identify the contours in our image. Contours are any edge that can be traced. It is very helpful that we have a binary image, so it is clear where the contours are. All we have to do is use the following line of code and it outputs an area of the contour information.
_, cnts, _ = cv2.findContours(BinaryFrameCombo, cv2.RETR_EXTERNAL, cv2.CHAIN_APPROX_SIMPLE)
Contour processing
We take the list of contours, and we run the following loop over all the found contours. We use the minimum contour area global variable to define the minimum size a contour must be. This allows us to throw out smaller objects that we do not want to detect. Additionally, we calculate the center of mass of the contour using a bounding rectangle.
for c in cnts:
    #if a contour has small area, it'll be ignored
    if cv2.contourArea(c) < MinContourArea:
        continue

    #draw an rectangle "around" the object
    (x, y, w, h) = cv2.boundingRect(c)

    #find object's centroid
    CoordXCentroid = (x+x+w)/2
    CoordYCentroid = (y+y+h)/2
    ObjectCentroid = (int(CoordXCentroid),int(CoordYCentroid))
Tracking
This was all my code. I decided to track the objects to see what direction each person was going. In order to do this, I needed some information:
- Object position.
- List of objects from previous frames.
- Whether or not a previously tracked object had crossed the center.
It is helpful to look at my helper functions for this section. The first function is ContourCompare.
# This function compares 2 contours to see if they could possibly be the same contours
def ContourCompare(contour1, contour2):
    (x, y) = contour2[0]
    (cx, cy) = contour1[0]
    distance = math.sqrt((x-cx)**2+(y-cy)**2)
    #print(str(distance))
    return distance < MovementTolerance
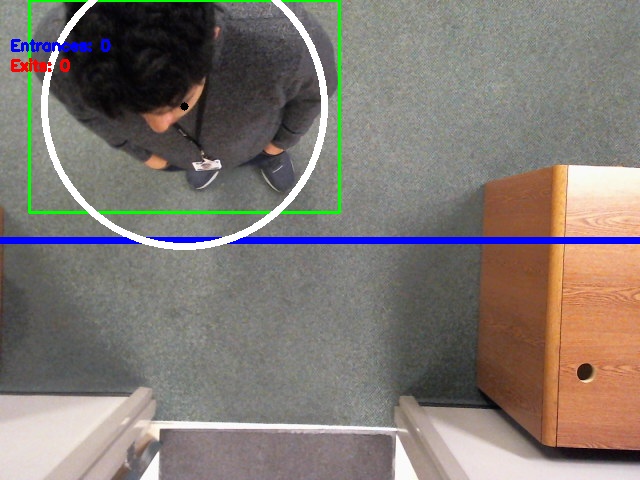
Using the Pythagorean theorem, we calculate distance between two centroids of two contours. This function returns true if the distance is less that than the movement tolerance we set above. See the final processing image bellow to see the ring of movement.
The next helper function we use is ContourTrack.
# This function compares 1 coutour with a list and returns the first match
def ContourTrack(contour, contourlist):
    if len(contourlist) == 0: # if the list is empty, then return -1
        return -1

    #check all the items for a match
    for x in range(0, len(contourlist)):
        if ContourCompare(contour, contourlist[x]):
            return x

    return -1
This function uses our other function to find matching contours. This algorithm can be improved in the future. However, it is not critical right now.

Complete Code
from datetime import datetime #import datetime to get the date and time
import math
import cv2
import numpy as np
import logging

#global variables
width = 0
height = 0
EntranceCounter = 0
ExitCounter = 0
LineWidth = 5
MinContourArea = 9000  #Adjust ths value according to your usage
MovementTolerance = 100
BinarizationThreshold = 60  #Adjust ths value according to your usage
ReferenceFrame = None #ReferenceFrame

logging.basicConfig(filename="Data/" + timeNow.strftime('%Y-%m-%d_%H:%M:%S') + "_logfile.log", format='%(asctime)s %(message)s', datefmt='%Y-%m-%d %I:%M:%S %p', level=logging.INFO)

logging.info("Created " + timeNow.strftime('%Y-%m-%d_%H:%M:%S') + "-HeadCount.csv")
logging.info("Type, Number")
logging.info("Entrances, 0")
logging.info("Exits, 0")

def ProcessGrayFrame(frame):
    #gray-scale convertion and Gaussian blur filter applying
    GrayFrame = cv2.cvtColor(Frame, cv2.COLOR_BGR2GRAY)
    GausFrame = cv2.GaussianBlur(GrayFrame, (21, 21), 0)
    return GausFrame

def ProcessThreshFrame(frame):
    GrayFrame = ProcessGrayFrame(frame)
    #Background subtraction and image binarization
    FrameDelta = cv2.absdiff(ReferenceFrame, GrayFrame)
    FrameThresh = cv2.threshold(FrameDelta, BinarizationThreshold, 255, cv2.THRESH_BINARY)[1]
    FrameDilate = cv2.dilate(FrameThresh, None, iterations=2)#Dilate image and find all the contours
    return FrameDilate

# This function compares 2 contours to see if they could possibly be the same contours
def ContourCompare(contour1, contour2):
    (x, y) = contour2[0]
    (cx, cy) = contour1[0]
    distance = math.sqrt((x-cx)**2+(y-cy)**2)
    #print(str(distance))
    return distance < MovementTolerance

# This function compares 1 coutour with a list and returns the first match
def ContourTrack(contour, contourlist):
    if len(contourlist) == 0: # if the list is empty, then return -1
        return -1

    #check all the items for a match
    for x in range(0, len(contourlist)):
        if ContourCompare(contour, contourlist[x]):
            return x

    return -1

#start capturing footage
camera = cv2.VideoCapture(0)

#force 640x480 webcam resolution
camera.set(3,720)
camera.set(4,480)

BinaryFrame1 = np.zeros((480, 640), dtype=np.uint8)
ContourData = []
ActiveContours = []

#The webcam maybe get some time / captured frames to adapt to ambience lighting. For this reason, some frames are grabbed and discarted.
for i in range(0,20):
    (grabbed, Frame) = camera.read()
    ReferenceFrame = ProcessGrayFrame(Frame)

#encapsulate infinite while block inside a try statement
try:
    while True:
        (grabbed, Frame) = camera.read()

        timeNow = datetime.now()

        height = np.size(Frame,0)
        width = np.size(Frame,1)

        #if cannot grab a frame, this program ends here.
        if not grabbed:
            break

        BinaryFrame2 = ProcessThreshFrame(Frame)

        BinaryFrameCombo = cv2.bitwise_or(BinaryFrame1, BinaryFrame2)

        # combine the last two frames and fine the contours
        _, cnts, _ = cv2.findContours(BinaryFrameCombo, cv2.RETR_EXTERNAL, cv2.CHAIN_APPROX_SIMPLE)
        BinaryFrame1 = BinaryFrame2

        #plot reference lines (entrance and exit lines)
        cv2.line(Frame, (0,int(height/2)), (int(width),int(height/2)), (255, 0, 0), LineWidth)


        #check all found countours
        for c in cnts:
            #if a contour has small area, it'll be ignored
            if cv2.contourArea(c) < MinContourArea:
                continue

            #draw an rectangle "around" the object
            (x, y, w, h) = cv2.boundingRect(c)
            rectBounds = (x, y, w, h)
            cv2.rectangle(Frame, (x, y), (x + w, y + h), (0, 255, 0), 2)

            #find object's centroid
            CoordXCentroid = (x+x+w)/2
            CoordYCentroid = (y+y+h)/2
            ObjectCentroid = (int(CoordXCentroid),int(CoordYCentroid))
            cv2.circle(Frame, ObjectCentroid, 1, (0, 0, 0), 5)
            cv2.circle(Frame, ObjectCentroid, MovementTolerance, (255,255,255), 5)

            crossedBoundary = False

            #create new tuple of object
            ContourTuple = (ObjectCentroid, crossedBoundary)

            #compare to list
            cResult = ContourTrack(ContourTuple, ContourData)

            if cResult is -1:
                ActiveContours.append(ContourTuple)
            else: # replace the previous contour data with the new contour data
                #Check to see if you crossed the line in the middle
                if ContourData[cResult][1]: #tracked object has already crossed the line
                    ContourTuple = (ContourTuple[0], True)
                elif (ContourData[cResult][0][1] >= height/2 and ContourTuple[0][1] <= height/2):
                    if not ContourData[cResult][1]:
                        EntranceCounter = EntranceCounter + 1
                        ContourTuple = (ContourTuple[0], True)
                        logging.info("Entrances, " + str(EntranceCounter))
                elif (ContourData[cResult][0][1] <= height/2 and ContourTuple[0][1] >= height/2):
                    if not ContourData[cResult][1]:
                        ExitCounter = ExitCounter + 1
                        ContourTuple = (ContourTuple[0], True)
                        logging.info("Exits, " + str(ExitCounter))

                ActiveContours.append(ContourTuple)


        ContourData = ActiveContours
        ActiveContours = []

        #Write entrance and exit counter values on frame and shows it
        cv2.putText(Frame, "Entrances: {}".format(str(EntranceCounter)), (10, 50),
                    cv2.FONT_HERSHEY_SIMPLEX, 0.5, (250, 0, 1), 2)
        cv2.putText(Frame, "Exits: {}".format(str(ExitCounter)), (10, 70),
                    cv2.FONT_HERSHEY_SIMPLEX, 0.5, (0, 0, 255), 2)

        cv2.imshow("Original Frame", Frame)

        cv2.waitKey(1);

except KeyboardInterrupt:
    # cleanup the camera and close any open windows
    camera.release()
    cv2.destroyAllWindows()