Intern Rocketry Club Recovery Subsystem Lead
10 May 2018 - Mateo Atwi
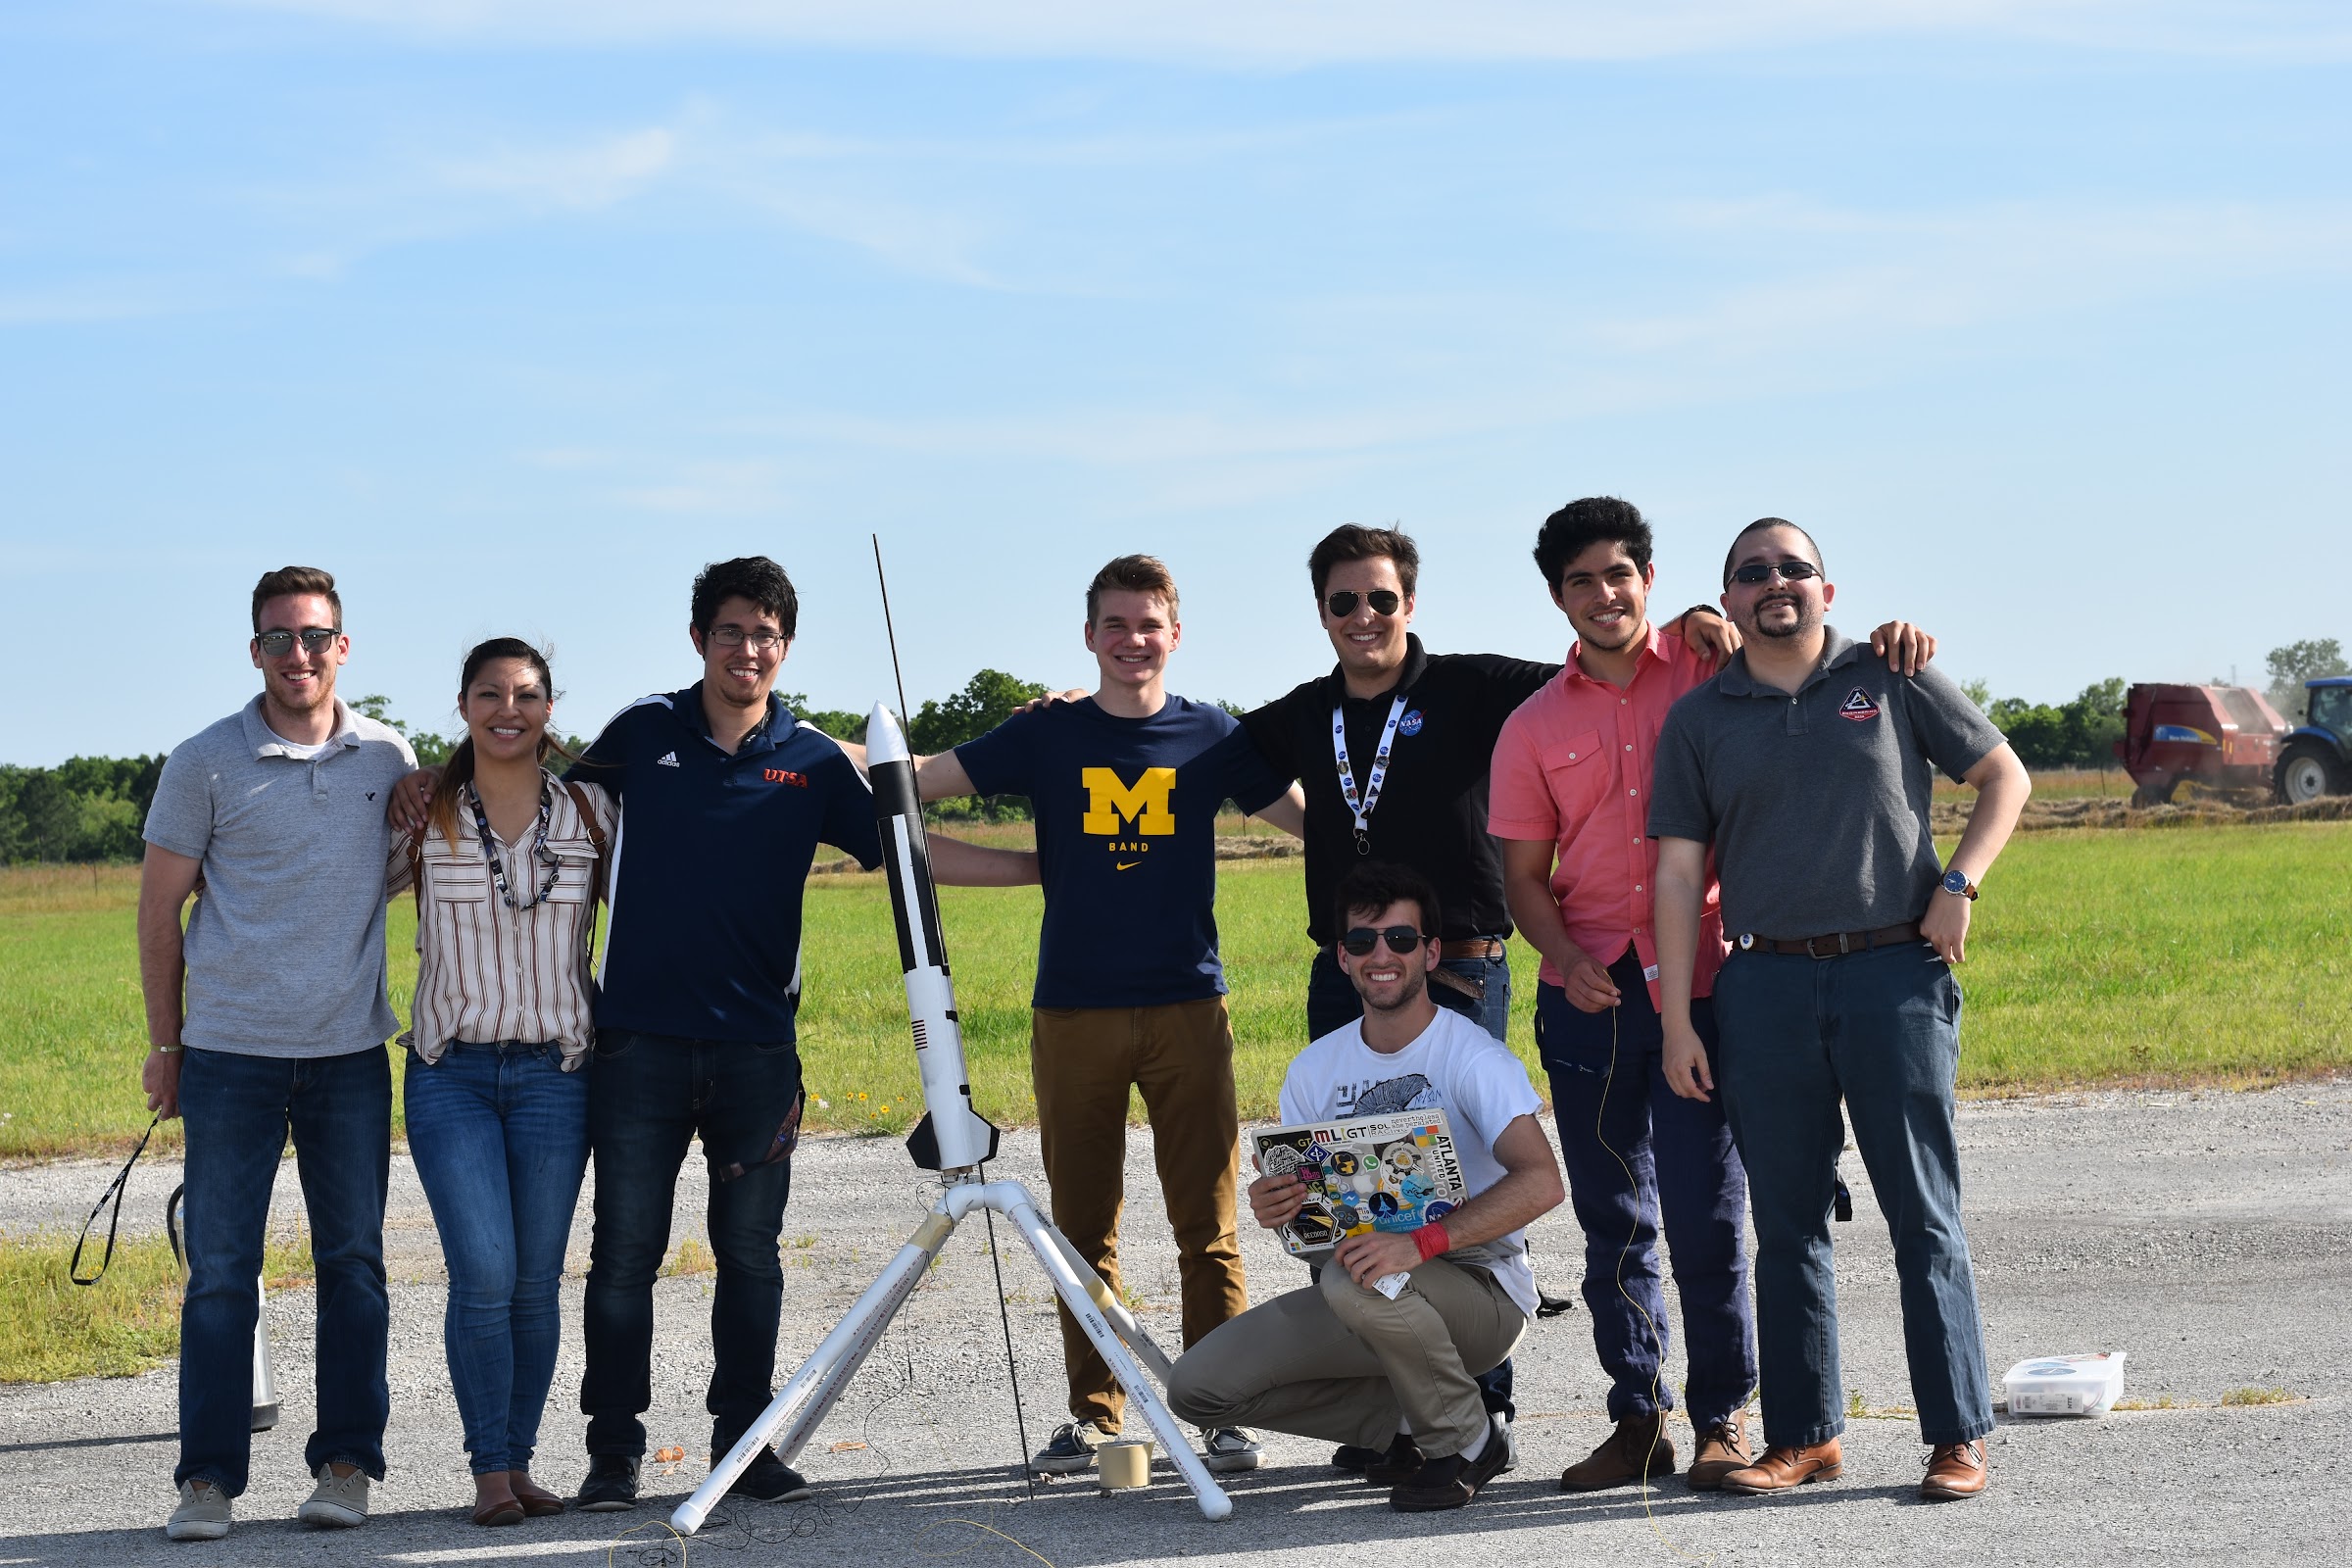
My first semester at NASA I worked as the recovery subsystem lead on the intern rocket. My team designed and fabricated our own parachute for a very cheap price. It worked perfectly when we launched.
Skills Learned and Used
- Building a parachute from scratch
- Model rocket design
- 3D printing
- Teamwork
Background
This was the first semester that the rocketry club at JSC was a formal intern committee. There was no handover documents. There was no prior experience. Only a few members on the team had ever built a model rocket from scratch. So we dived right into it. I volunteered to be the recovery subsystem lead. I was in charge of delivering a system for returning the rocket. I worked closely with Peata Ameperosa. She is really good at building parachutes, and she is a lot of fun to work with!
Design
Here are my design requirements that I developed with the other people in my team:
- Descent rate between 12 and 18 feet per second
- Cheap
- Handmade
After doing my research, I decided to make my own parachute. It would be more fun to make my own. Once I had a general idea of the size and weight of the rocket, I used a website to calculate the radius required for a descent rate of around 15 feet per second. Because it was easier to cut, I decided to make a hexagonal parachute. Additionally, that made it very simple to find points for mounting the shroud lines.
Another intern and I went to Wallmart and purchased a purple tablecloth. We used an exacto knife to cut it into a hexagon. Next, we reinforced the corners with duct tape first then we clamped metal grommets onto the duct tape patches. The duct tape served to distribute the load from the shroud lines that would be tied to the metal grommets.
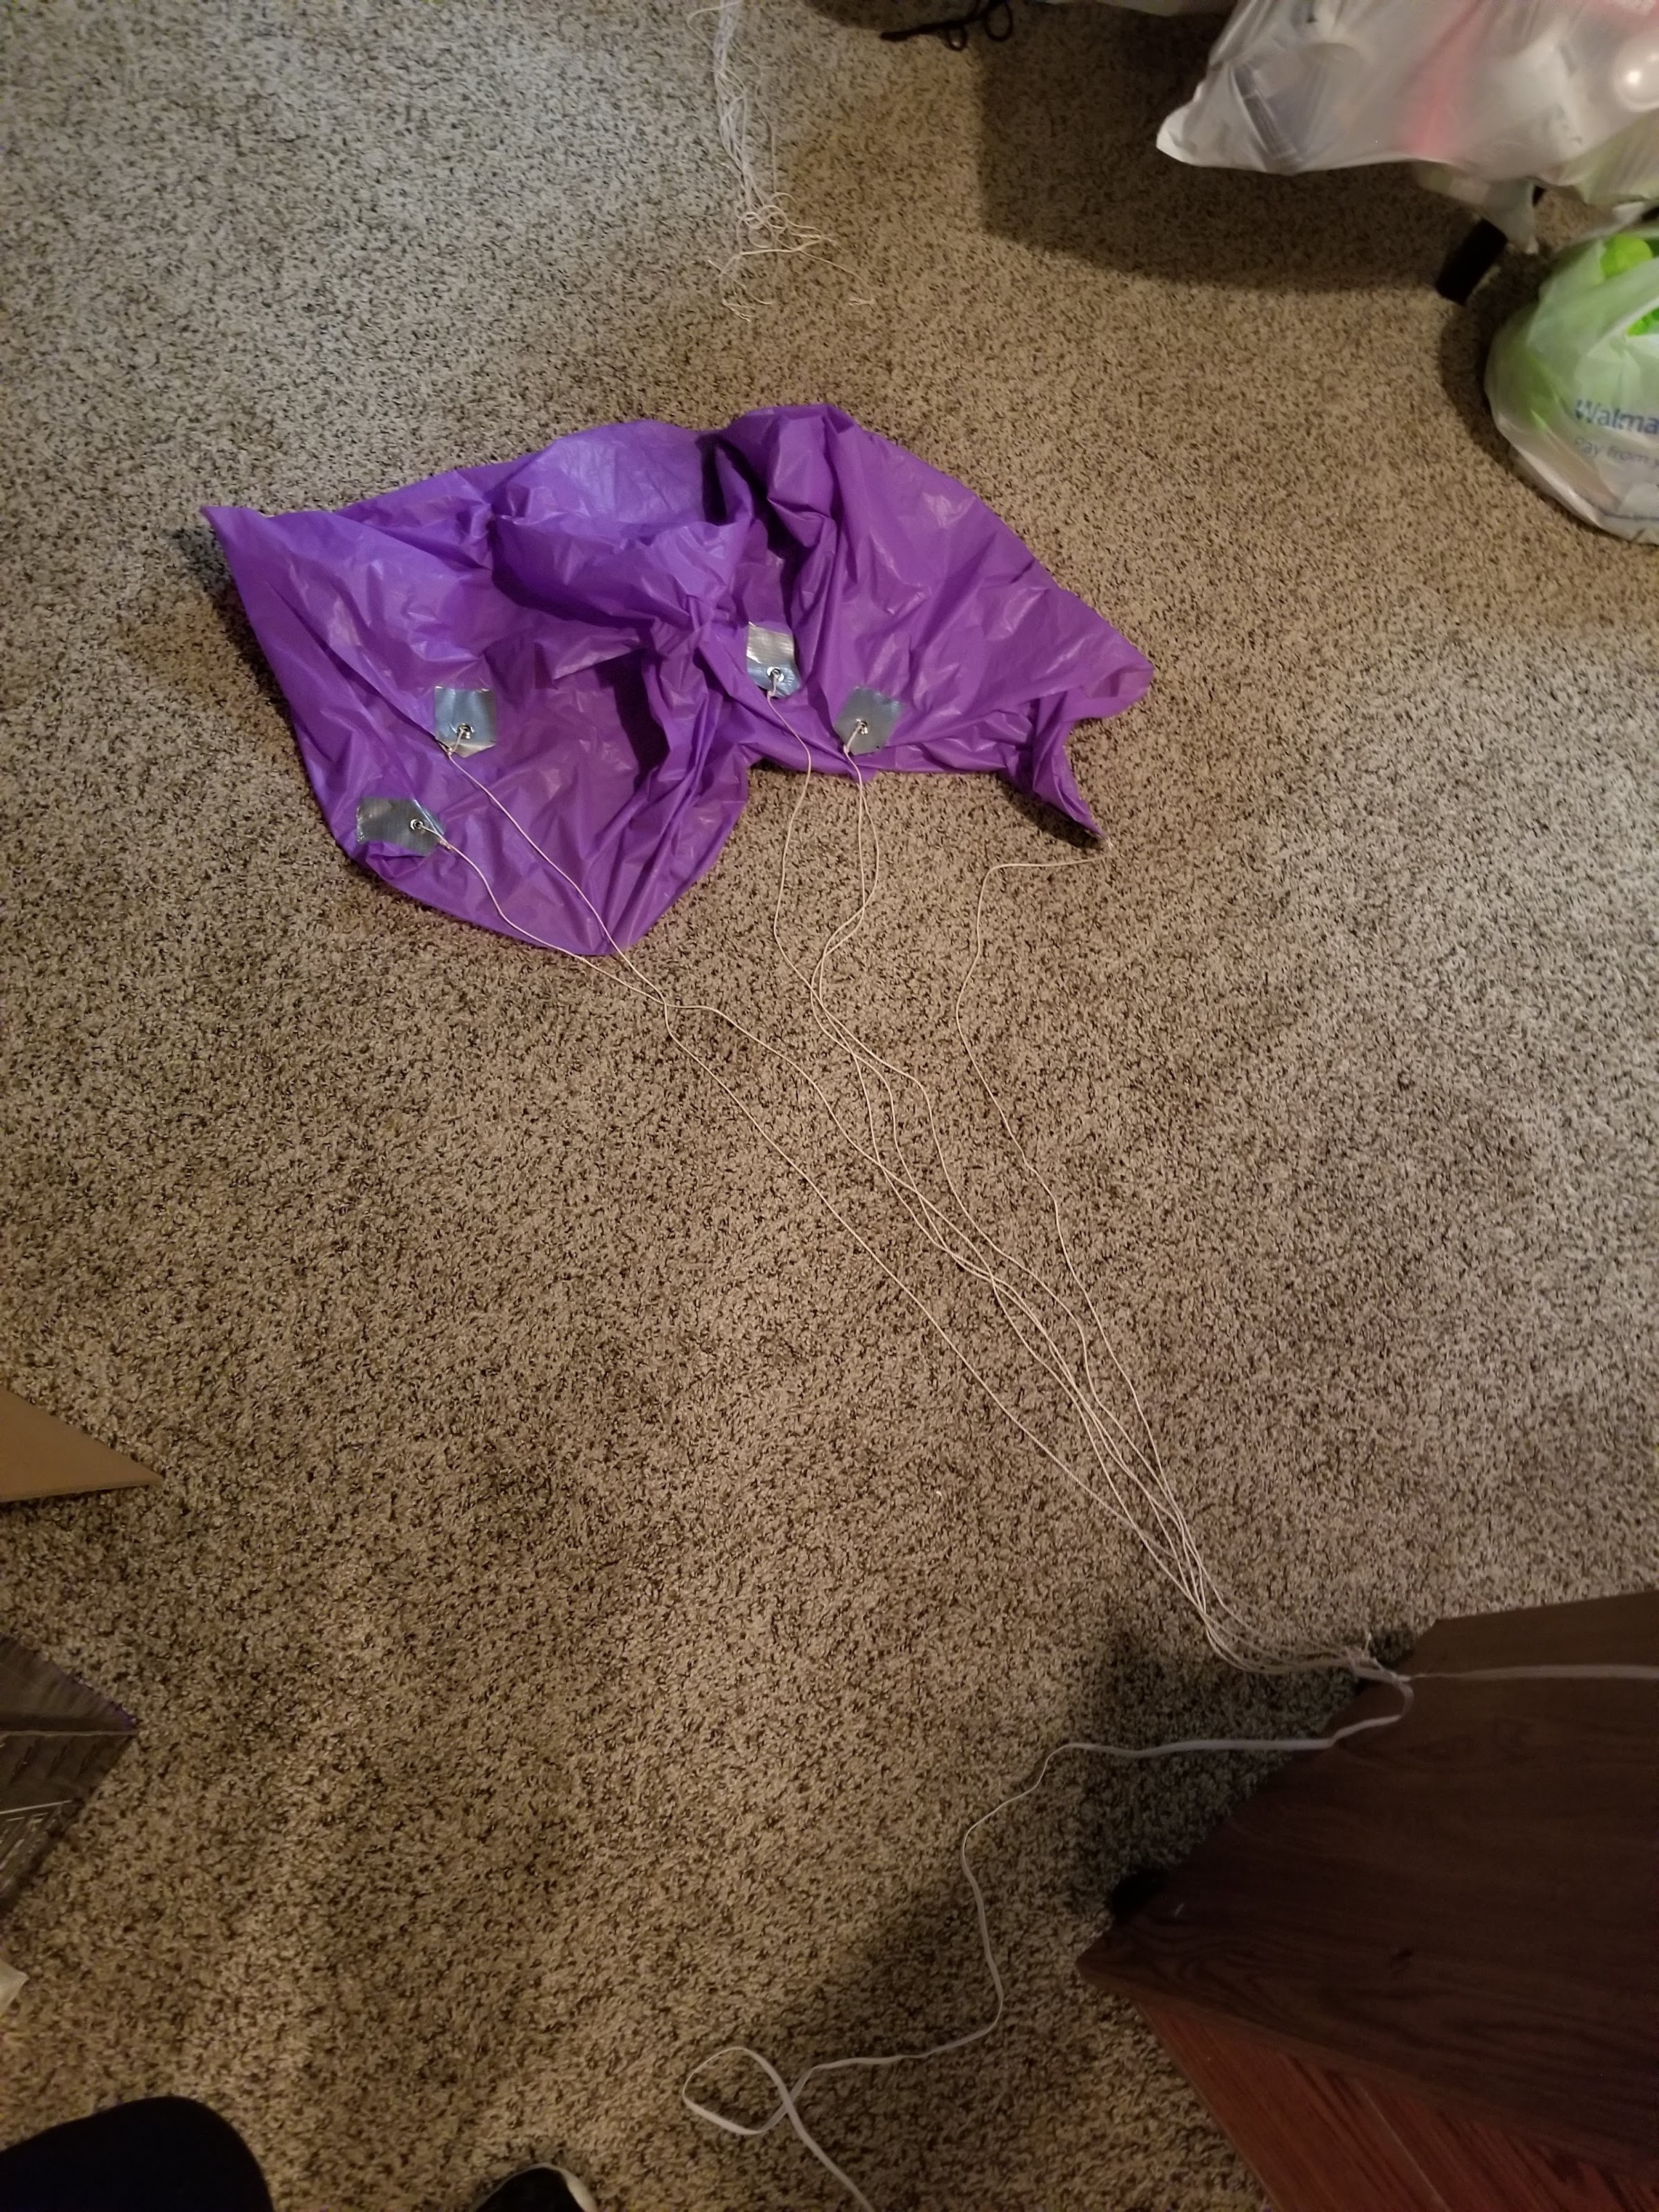
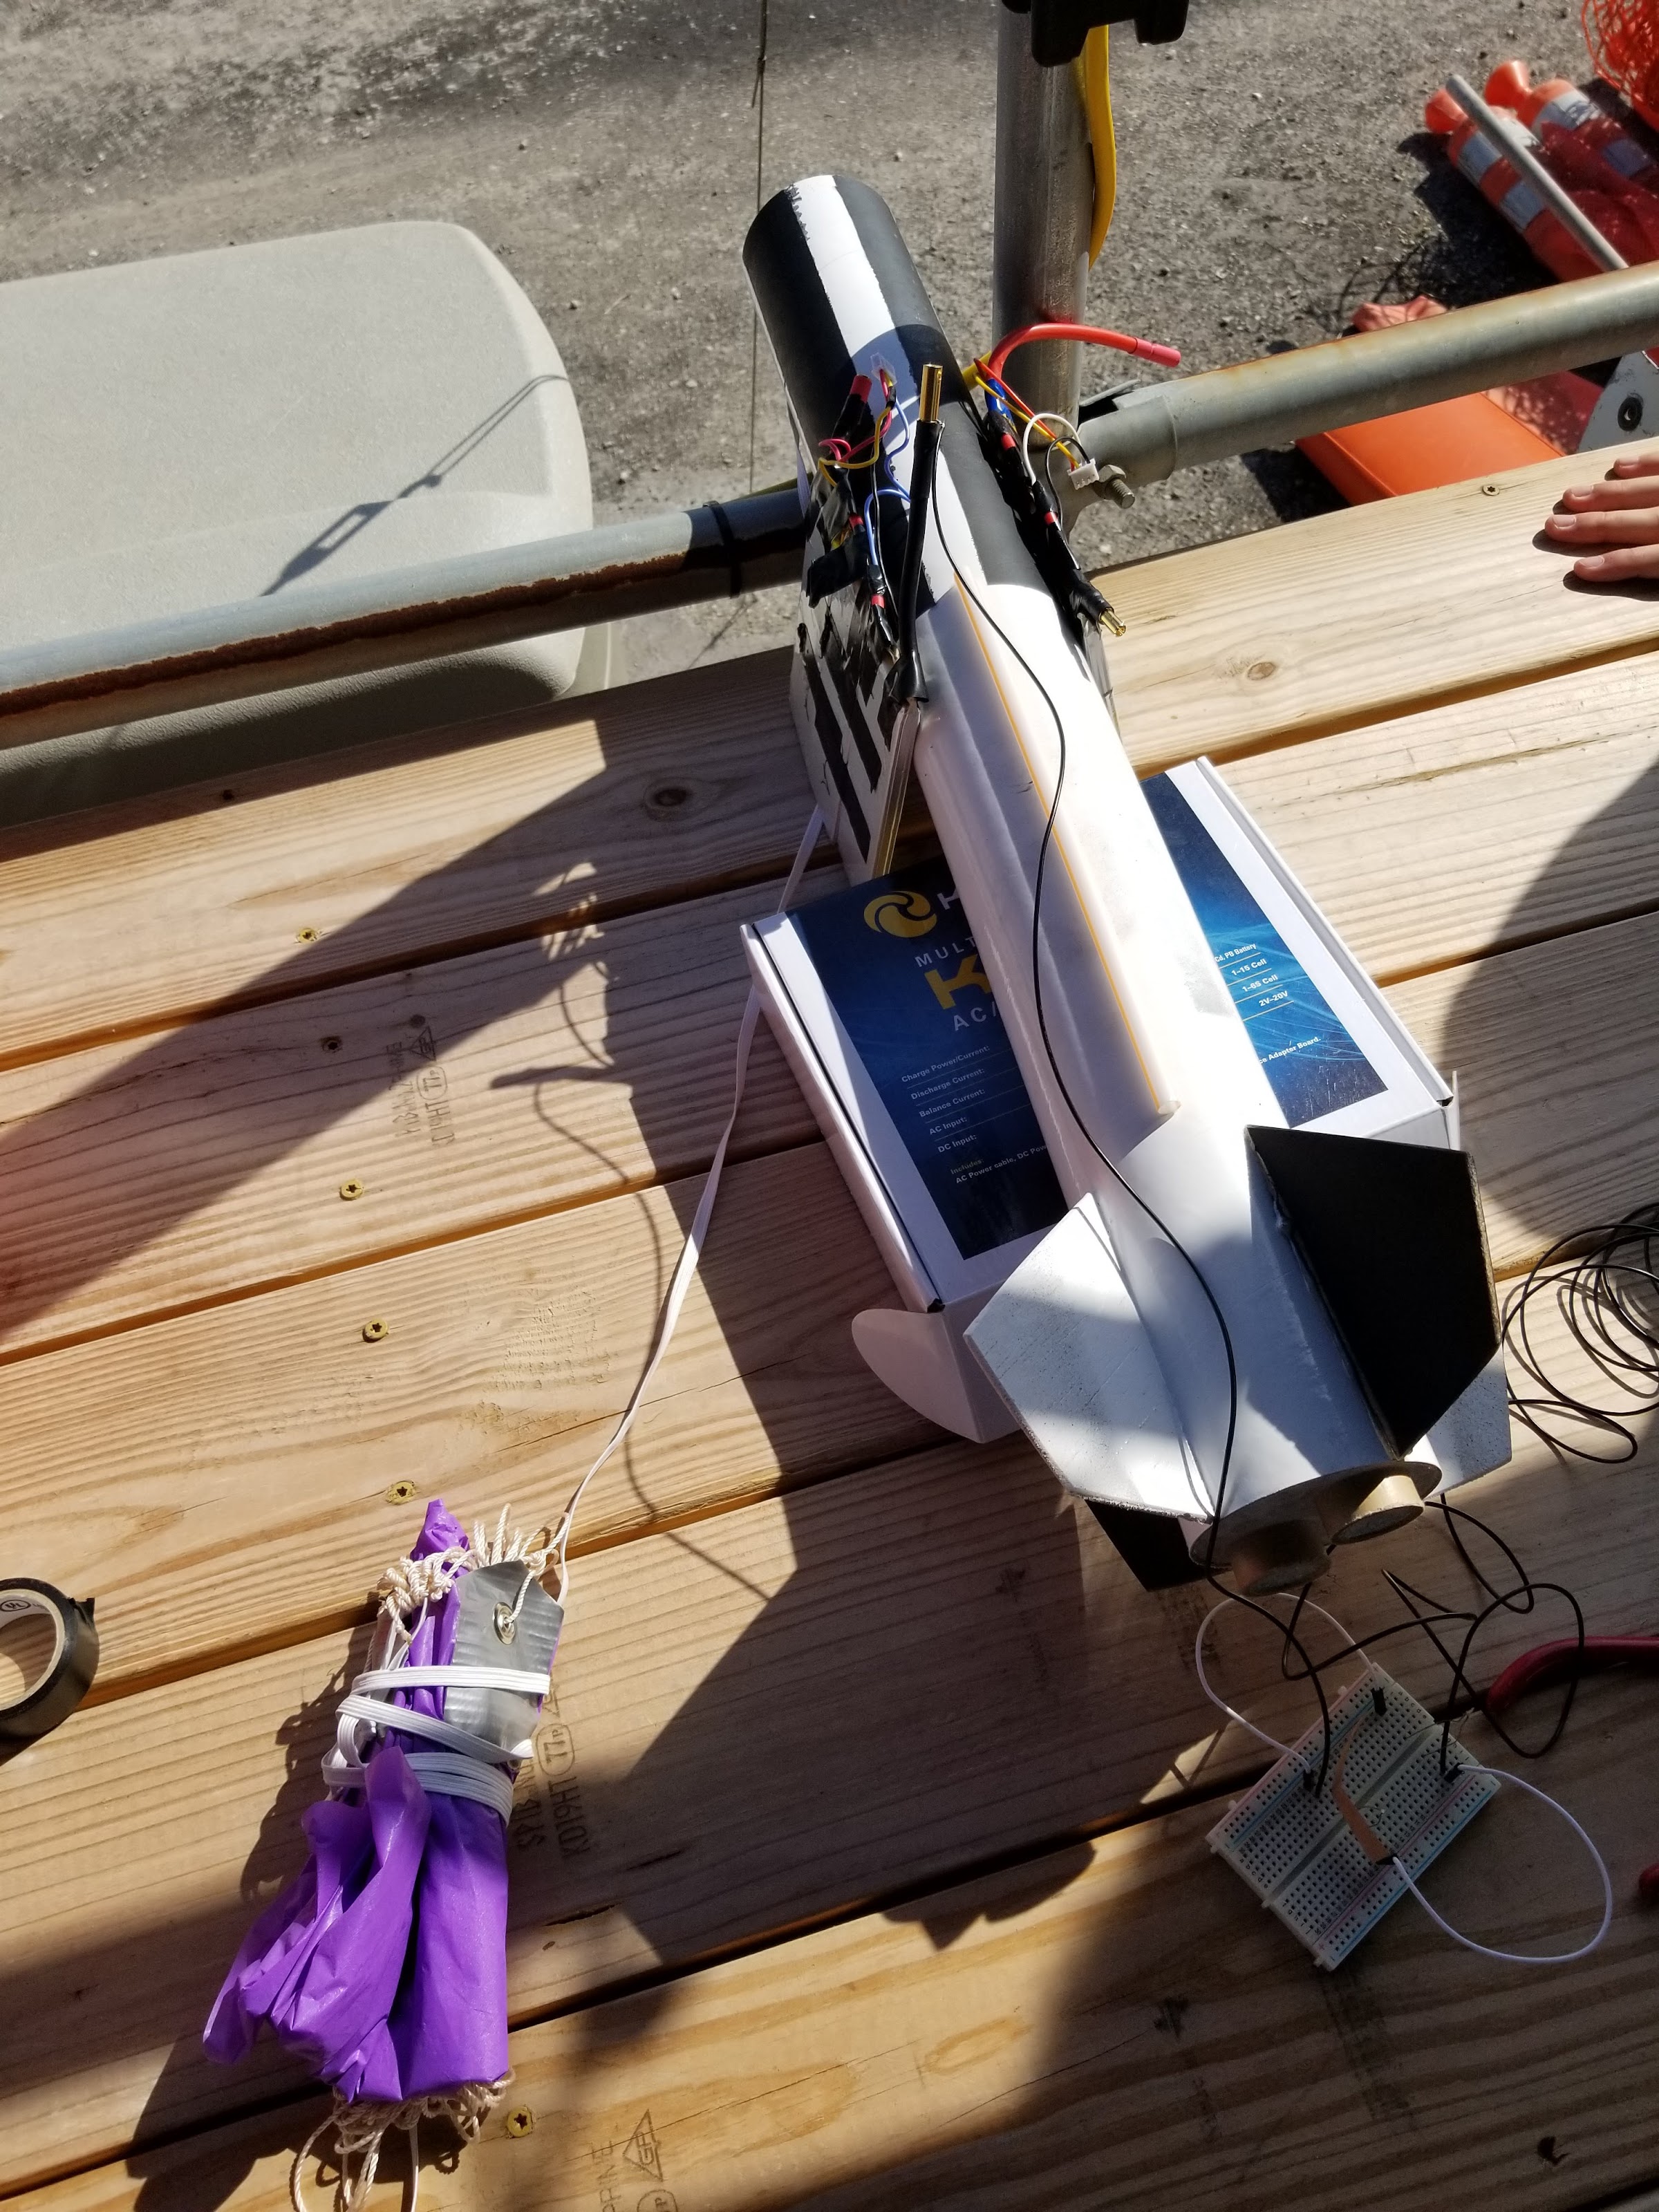
We found that the shroud lines should be about as wide as the diameter of the parachute. After tying the shroud lines, I tied an elastic band to the shroud lines. This band serves as the shock cable. I glued the other end of the elastic shock cable to the inside of the body after folding it around a peice of cardboard to help distribute the load on the interior surface of the rocket body.
Here’s some more testing:
Lessons Learned
This was a great project. We got to see our product from start to finish. The biggest flaw in our system was that we didn’t have a good way to attach to the 3D printed nosecone. I highly recommend having a strong tab on your nosecone to tie your shock cable to. It is worth it!